
Make a Guitar
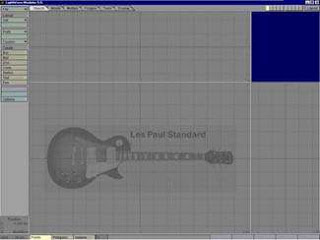
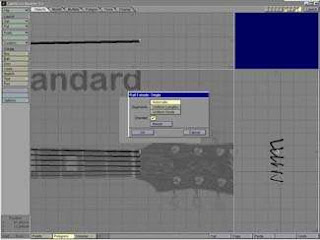
1. First off, it's useful to have a picture to base yourself. So got your picture and set to go.
In lightwave, make this picture as your backdrop on the face view.
This will be a great guide for your work, without it everything would be guesses and it would be far from exact.
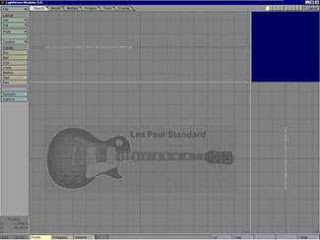
2. Now, start with the guitar's body.
Start off by laying points (shift +) around the shape of the body.
Once your done press ctrl + p to make a spline.
You can then move/add/remove the points until you are satisfied with how they are place, then press ctrl+d to freeze that spline.
Name that surface "Guitar Body - Front" .
Pick a color and set some specularity.
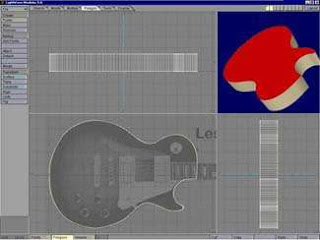
3. Now extrude it on the "z"-axis.
Whatever distance you see fit, depending on the guitar your modeling.
Select the polygons on the "x" axis, and name that surface to "Guitar body - side" .
Select the back poly, and name it "Guitar Body - Back".
4. Now, enough on the body for now, we'll get back to that later.
Let's move on the neck of the guitar
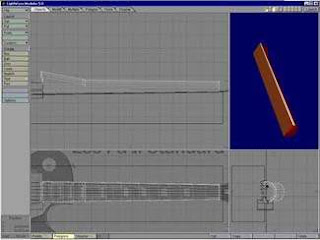
Open a new layer, create an elongated elliptical disc on the "x" axis, and then on another layer, create a box that covers the front portion of it, and with the disc layer selected and the box layer in the background, perform a boolean substract (shift b).
Then performed a taper along the "y" axis because it is not a perfect rectangle.
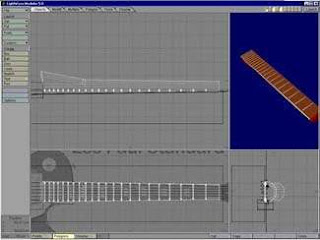
5. Name your disc surface "Neck - Back", and your box surface "Neck - Front".
For the frets, just made a disc which cut in half along the neck - front, and adjusted some points (with knife tool and drag tool) and copied it while placing it along the neck where they belong.
Finally performe the same taper as the neck, so the size adjusted with the neck.
6. There, now you can adjust that booleaned disc so it fits how you would like it too.
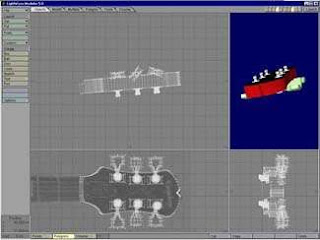
Next we will move on to the head of the guitar, you could do this two ways depending on
the shape.
Chose to use the same technique as you did on the body, which is make a spline, freeze it (ctrl+d), and extrude it.
Make sure that it fits nicely into the neck of the guitar and there you go. for the little thingies on the head, made a spline and lathed it, made a disc on another layer and substracted it from the
lathed object.
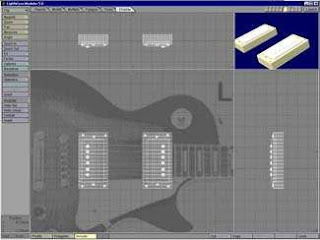
7. Enough of that, now for the details on the body.
Just made a box, metaform (shift+d) a couple of times, depending on how sharp the corners, then selected the inside polygons and place sized them up.
Once you satisfied with that smooth shifted them (shift + f) and pushed them back in
the "z" axis and put on metanurbs (tab).
Then renamed it to "Chrome parts" because its a nice and shiny pickup and smooth shifted again and this time moved it the other way in the "z" axis.
For the screws,
its just a flattened ball with a rectangle booleaned out of them.
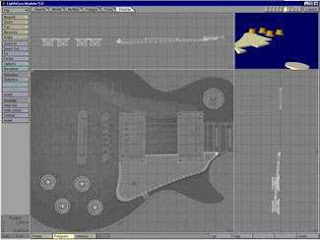
8. Now for the pick guard, again went with the spline / freeze / extrude technique.
After layed out the points, ctrl+p to make the spline, adjust the points, ctrl+d to freeze,
ctrl+e to extrude on "z" axis.
Then just moved it around, rotated it, moved some poly's until it fit nicely into guitar.
9. For the strings, could of just made a disc and stretched it, knifed it, moved some polys etc. But the other way was to make a spline.
Following the path of the string, and then on another layer make a disc about the size of the string.
Now with the disc layer selected and the spline in the background layer, press ctrl+r and perform a rail extrude.
Default settings are good but make sure your disc is at the start of your spline or else
everything will screw up, the same rotation helps too.
Now repeat this process for the rest of your strings.
Hope you'll enjoy the tutorial
Credit To : NewTek Lightwave 3D


