Creating a 3D Logo
Step 1: Load LightWave Modeler and set up your workspace the way you like it. I prefer
the Default setup.
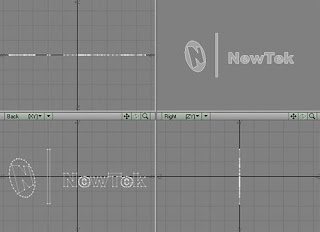
Step 2: To import the vector file bring up the EPSF Loader under File/Import in Modeler.

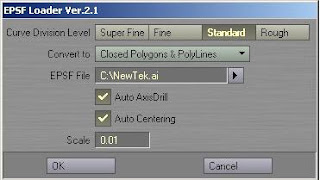
This brings up the EPSF Loader window:
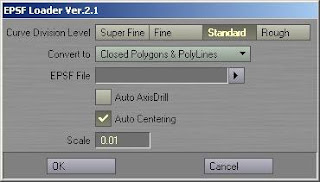
Curve Division Level determines how many vertices are applied to the curve of the geometry. For this example we will use the default setting "Standard".
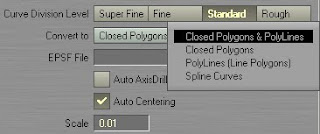
Convert to allows you to choose between the type of geometry that you would like to convert the Vector art to.
We will use the Default setting "Closed Polygons & PolyLines". EPSF File requestor. This is where you select the file to import. For this example we will use a familiar logo.
When Auto Axis Drill is selected, LightWave will automatically perform an operation to remove the holes in the geometry. An example of this would be the holes in the letter "B" or "O". For this example we will want this selected.
Auto Centering does just that. It automatically centers the object. We will leave this selected.
The Scale setting allows you toscale your object before it is created.We will use the Default setting "0.01".
With the settings from above, the EPSF Loader window looks like this:
Step 3: Click OK.
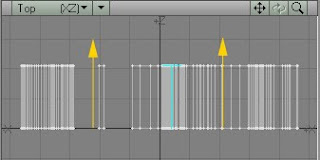
Step 4: Now that we have the Logo in LightWave, we can make it 3D. Select the Extrude
Tool, "Multiply/Extend : Extrude".
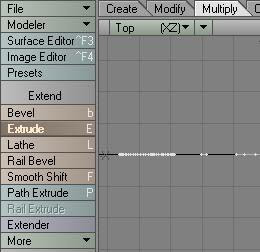
Step 5: With the Extrude tool selected Left Click and drag the cursor up in the Top view port.
Use the blue "T" handle to adjust the depth of the extrusion.
Step 6: Press the "Enter" Key to apply the changes.
Done for Part 1
Part 2: Surfacing the Logo
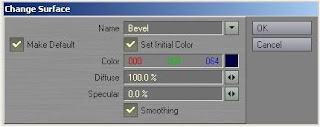
Step 1: Load the Beveled Logo that you just created if it is not already loaded. Choose Surface (q), (Detail/Polygons: Surface).
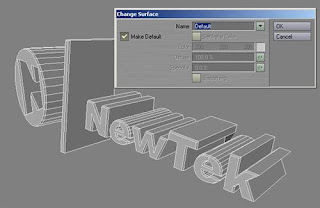
Step 2: Change the Name to "Sides", pick a Color using the color picker, and Select Smoothing. The Change SurfaceWindow should look like the image below.
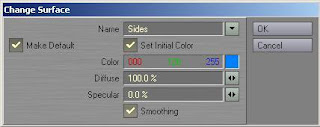
Step 3: Click OK.

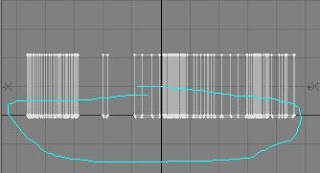
Step 4: Lasso select (Right Click and Drag) the Bevel and Front polygons on the entire 3D Logo.
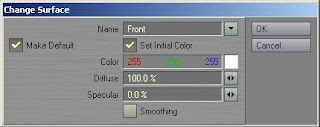
Step 5: Surface these Polygons with the following settings:
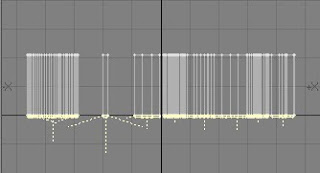
Step 6: With the polygons still selected, unselect the Front faces by clicking on them.
Click OK.
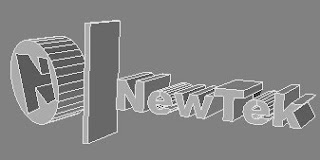
The logo should look something like this:

Save your work and Done For Part 2
Part 3: Animating the Logo
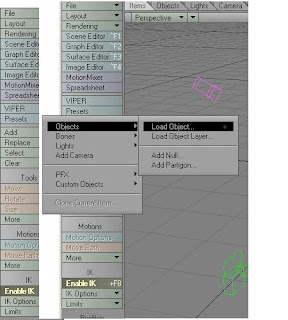
Step 1: Load the Surfaced Logo from the previous page into Layout. (Items/Add; Load Object)
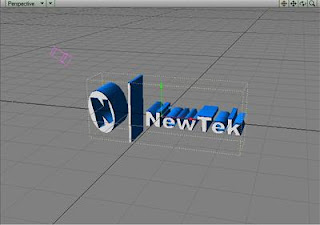
Your scene should look something like the image below:
Step 2: We want our animation to last for 6 seconds, so we need to change the Last frame
on the Timeline. For NTSC animators that would be 180 frames, and for PAL animators,
that is 150 frames. (180 frames/30 frames a second = 6 seconds).

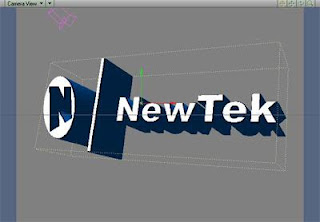
Step 3: Change theWorkspace viewport to Camera.

Step 4: Move the Frame Slider to frame 180.

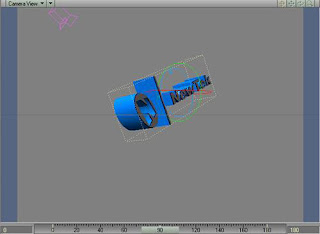
Step 5: With the Logo still selected Move (Items/Tools: Move) the Logo closer to the Camera and then select the Rotate (Items/Tools: Rotate) tool and Rotate it so that it has a dramatic look at the end of the animation. Here is what I came up with:
Step 6: Create a Key Frame (Enter key) or (Create Key located at the bottom of the screen). This tell LightWave that it needs to remember the Logo's location and orientation at frame 180.

Step 7: Go back to Frame "0" and move the Logo off screen in the upper-left hand corner.

Step 8: Create a Key Frame.
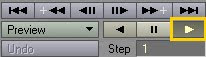
Step 9: Use the play button to see an OpenGL preview of the animation you just created.
Step 10: Move the Frame slider to the mid-point (either 75 or 90 frames). Move and Rotate the to the center of the screen. I went with some wacky rotation on mine below. Create a Key Frame and Play an OpenGL preview of the animation.
Step 15: Play of your animation and enjoy the results.